What readers usually run into
- 복사 흐림
- 누런 종이색
- 인쇄 낭비
- 약한 OCR 결과
Why the background turns gray
Gray background usually comes from copier haze, old paper color, scanner exposure, shadows near the spine, or a PDF made from multiple photocopy generations. The page may look wasteful when printed and OCR may perform poorly because the software sees background texture as noise.
Clean background separately from text
The safest prompt asks for reduced gray background and darker text at the same time. If you only ask to whiten the page, thin table rules, pencil marks, formulas, and light stamps can disappear. A good cleanup preserves meaningful marks while lowering the visual weight of the paper tone.
Best documents for this cleanup
This works well for office scans, academic handouts, photocopied worksheets, contracts copied in grayscale, and old documents where text is present but buried in haze. It is not a replacement for OCR correction, PDF compression, merging, or form filling.
How to review the result
Inspect small characters, tables, borders, and low-contrast annotations. If the page looks artificially white or details vanish, regenerate with a prompt that says to preserve fine lines and use light background cleanup.
Before and after signs to look for
A good after image should have calmer paper tone and stronger text without looking like a new document. The best signs are simple: paragraphs become readable at normal zoom, background haze no longer competes with letters, table rules are still present, and diagrams or formulas keep their shape. A bad result often looks bright at first but removes pale information. That is why the review step should include details, not just the overall page color.
Why aggressive whitening can backfire
Many gray-background scans contain real content that is also light gray: pencil notes, signatures, stamps, pale grid lines, scanned illustrations, and old paper texture. If the prompt says only "remove gray background," the output may treat those details as noise. Add instructions such as "preserve thin marks" and "do not erase annotations" when the document includes anything beyond plain dark text on white paper.
When OCR is part of the plan
If the next step is OCR, clean for legibility rather than perfection. OCR generally benefits from higher contrast and less background noise, but it can still misread numbers, punctuation, and table structure. Export the visually cleaned PDF, run OCR in a separate tool, and compare the recognized text with the original scan. RedesignPDF should be the image cleanup step, not the text verification step.
Printing and sharing considerations
Gray backgrounds often become more annoying when the document is printed or shared in a small preview. A cleaner background can reduce ink use and make the page feel less muddy, but the exported PDF should still be checked on the medium you care about. If you plan to print, inspect margins and pale lines. If you plan to email the file, open the exported PDF and confirm that the page remains readable at common preview sizes.
Recommended conservative prompt
A good prompt for this topic is explicit but restrained: "Reduce the gray scanner background and copier haze, darken faded text slightly, preserve thin lines, diagrams, handwritten notes, stamps, and the original layout." This tells the model what to improve and what not to touch. If the result still looks too gray, increase cleanup gradually rather than jumping to an extreme whitening instruction that may damage real content.
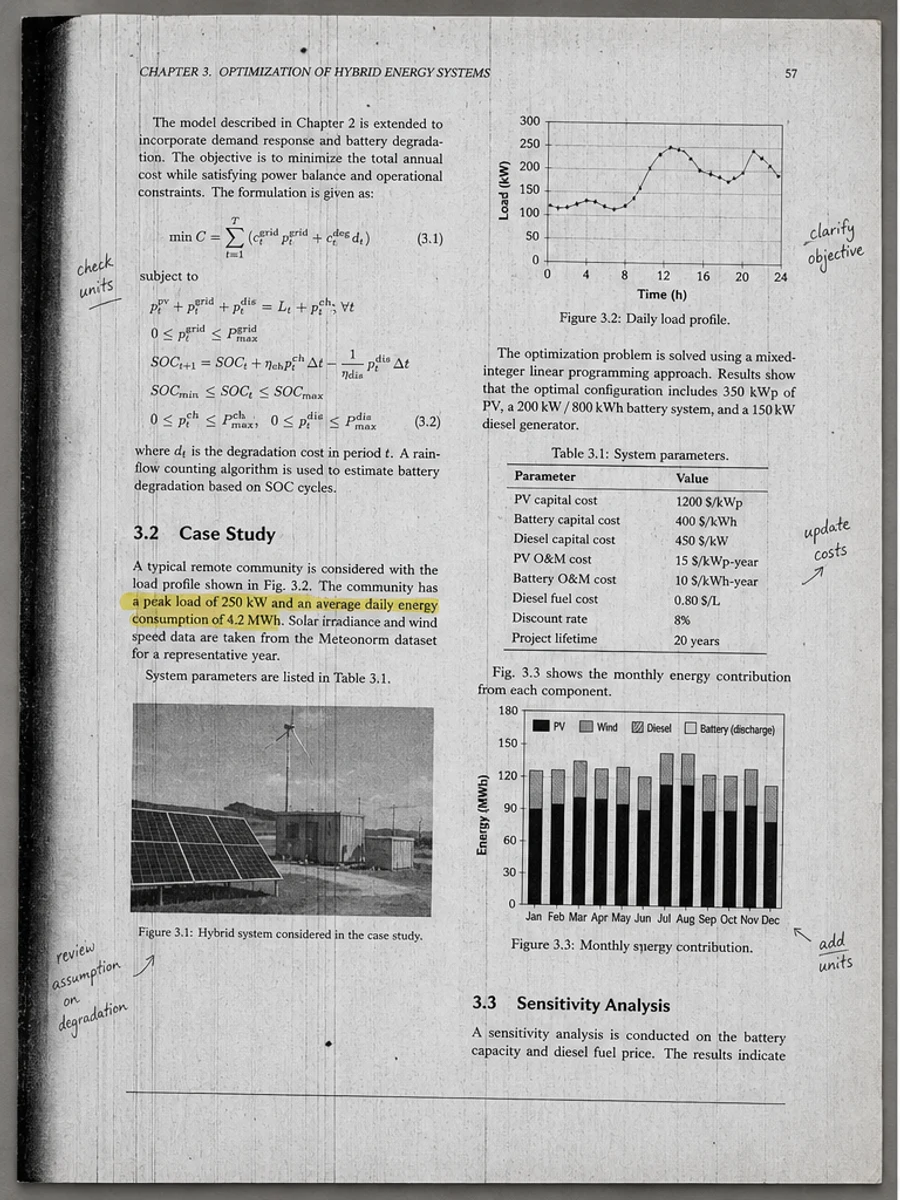
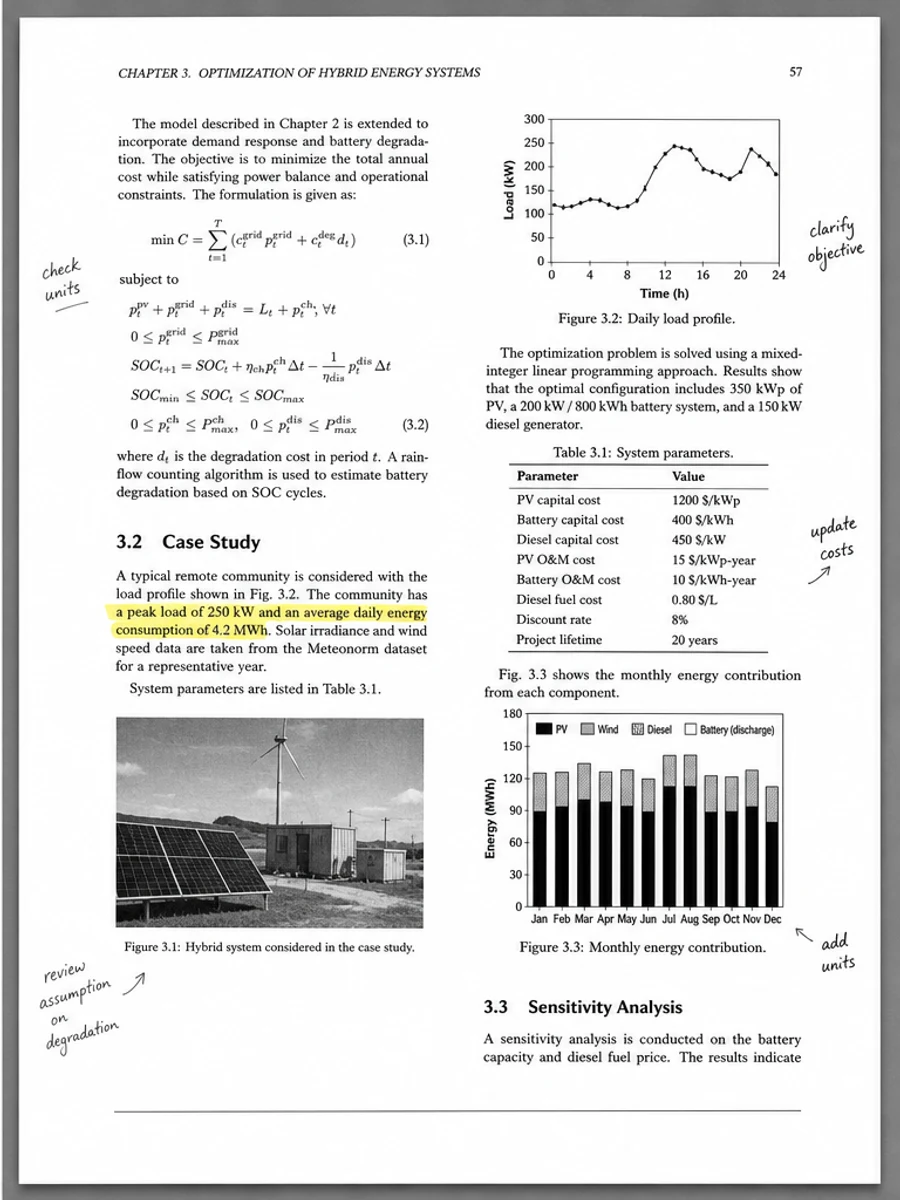
Inline before and after example: 스캔 PDF의 회색 배경 제거
Step-by-step tutorial
- 스캔 PDF를 엽니다.
- 먼저 “스캔 PDF의 회색 배경” 문제가 가장 잘 보이는 페이지를 선택합니다.
- 보수적인 가독성 개선 프롬프트를 사용합니다.
- 전후 결과를 비교합니다.
- 중요한 텍스트, 숫자, 날짜, 표를 확인합니다.
- 결과가 적절할 때 내보냅니다.
Prompts you can paste
01이 스캔 PDF 페이지를 정리하고 스캔 PDF의 회색 배경 문제를 개선하세요. 회색 배경, 그림자, 얼룩, 노이즈를 줄이고 원래 레이아웃을 유지하세요.
02가독성을 부드럽게 개선하세요. 흐린 텍스트를 진하게 하고 배경을 정리하며 필기, 도장, 표, 표시를 보존하세요.
03보수적으로 처리하고 OCR 텍스트 레이어를 만들지 않으며 페이지 구조를 바꾸지 마세요.
When RedesignPDF is a good fit
- 텍스트가 보이는 스캔 PDF 페이지
- 평면화되었거나 이미지 기반인 문서
- 시각적 가독성 향상이 목표인 파일
When it is not the right tool
- PDF 텍스트 레이어의 정밀 편집
- 인증된 법적 복원
- 검토 없는 자동 데이터 추출
흔한 실수
- 페이지를 지나치게 하얗게 만들어 얇은 선을 잃는 것.
- 시각 정리를 OCR이나 텍스트 변환으로 오해하는 것.
- 숫자, 날짜, 표, 필기를 확인하지 않고 내보내는 것.
Related reading
FAQ
RedesignPDF로 스캔 PDF의 회색 배경 문제를 개선할 수 있나요?
스캔된 페이지 이미지의 시각적 품질을 개선할 수 있습니다. 내보내기 전에 중요한 텍스트, 날짜, 금액, 표를 확인하세요.
내보낸 PDF의 텍스트를 선택할 수 있나요?
내보내기는 이미지 기반일 수 있습니다. 검색 가능하거나 선택 가능한 텍스트가 필요하면 OCR을 별도로 사용하세요.
공식 문서에 적합한가요?
주의해서 사용해야 합니다. RedesignPDF는 가독성 개선용이며 인증된 문서 복원 도구가 아닙니다.
Conclusion
If your goal is a clearer scanned PDF while keeping the original layout, start with a conservative prompt, process one page, and review text, tables, numbers, handwriting, and stamps before exporting. If you need editable text, PDF-to-Word conversion, form filling, or precise text-layer editing, use OCR, a PDF editor, or a better rescan instead.
Upload scanned PDF